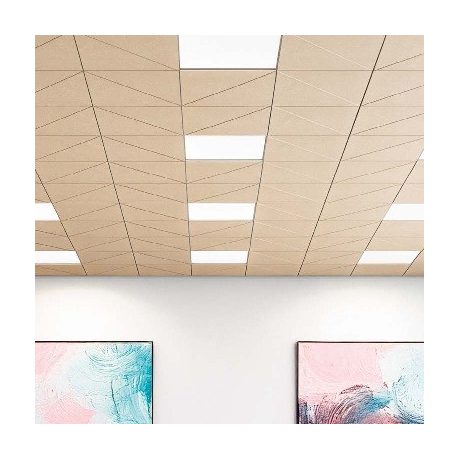
Acoustic Ceiling Tiles for Suspended Ceilings: Step-by-Step Installation and Maintenance
Published on 7 March 2026By Jonathan Rousseau4 min read

Preparing to install acoustic ceiling tiles for suspended ceilings
Acoustic ceiling tile installation requires careful preparation to achieve the best possible result. Before you start, it is essential to assess the condition of the existing ceiling and check its load-bearing capacity. This step will determine the type of suspension system to use.
Start by measuring the area to be fitted accurately and work out the number of tiles you need. Remember to add a 10% margin for cuts and any future replacements. Also check for building services (lighting, ventilation, sprinklers) that may require adjustments.
Essential tools and materials
- Laser or spirit level
- Drill and bits suited to the substrate
- Utility knife or jigsaw for cutting
- Tape measure and marking pencil
- Personal protective equipment
- T24 or T15 ceiling grid profiles
- Mechanical fixings suited to the ceiling
- Professional-grade acoustic ceiling tiles
Step-by-step installation guide
Step 1: Setting out and marking
Determine the height of your suspended ceiling, taking into account the service void required and the minimum height required by regulations. Use a laser level to mark a reference line on all perimeter walls. This line will serve as a guide when installing the perimeter wall angles.
Step 2: Installing the supporting grid
Fix the wall angles around the perimeter, with fixings spaced no more than 60 cm apart. Then install the main runners parallel to the longest wall, spaced 1.20 m apart. The cross tees, perpendicular to the main runners, should be spaced 60 cm apart.
For large-format acoustic ceiling tiles for suspended ceilings, reinforce the grid with additional hangers every 80 cm.
Step 3: Fitting the acoustic tiles
Start fitting from the centre of the room so that the cut tiles are distributed symmetrically around the edges. Lift each tile carefully and place it in its grid opening, taking care not to damage the edges. The tiles should rest evenly on the profiles without being forced.
When cutting, use a sharp utility knife and make several light passes rather than a single deep cut. Leave a 2-3 mm gap around the perimeter to allow for expansion.
Step 4: Integrating building services
Integrating lighting or air diffusers requires precise cuts. Use a template to mark the exact position and cut gradually. For a more complete approach, consider acoustic ceiling solutions that already integrate these features.
Cleaning and maintaining acoustic ceiling tiles
Regular and preventive cleaning
Regular maintenance significantly extends the life of your acoustic ceiling tile installation. Dust the tiles monthly using a vacuum cleaner fitted with a soft brush, set to the lowest power to avoid damaging the acoustic fibres.
For light stains, use a slightly damp sponge with lukewarm water. Avoid harsh chemicals at all costs, as they could impair the acoustic and aesthetic properties of the tiles.
Inspection and replacement
Inspect the general condition of your acoustic ceiling every three months. Check for cracks, warping or signs of damp that could indicate a more serious problem. Damaged tiles should be replaced promptly to maintain overall acoustic performance.
- Check that the suspension profiles are securely fixed
- Check the alignment of the tiles
- Look for signs of sagging
- Inspect the areas cut for building services
Annual preventive maintenance
Once a year, remove a few tiles to check the condition of the supporting grid and clean the service void. This allows you to detect any problems early and make the necessary adjustments. Take the opportunity to check that the fixings are tight and that the perimeter seals are in good condition.
Optimising acoustic performance
To get the most out of your acoustic ceiling tile installation, follow a few basic principles. Airtightness between the tiles is crucial: avoid excessive gaps that would create sound leaks.
The depth of the air gap between the existing ceiling and the tiles directly affects sound absorption performance. A depth of 20 to 40 cm optimises the absorption of low frequencies, which are particularly problematic in commercial spaces.
Adapting to how the space is used
In offices and open-plan offices, choose tiles with a high absorption coefficient in the mid frequencies (500-2000 Hz) to improve speech intelligibility. For dining areas, opt for tiles that perform well across a wide frequency range.
Don't hesitate to call on a professional acoustician to define your needs precisely and optimise your acoustic ceiling tile installation for your specific use.